Watch me pull an alien rabbit out of a hat

Yesterdays stream went very well! We rigged an entire character from scratch in about an hour and half. It’s as good an introduction to what Contour is all about as we’ve done so far. If you weren’t able to be there, come check it out here.

One of the things I’d like to do next is to take this weird alien rabbit and do a demonstration of the new ephemeral system with it, animating a scene live on stream. I don’t know if that’s the next one we’ll be doing or not, but it should be soon.

Pipe Stream

Honestly, I don’t know how I didn’t come up with that one right away. It should have been the very first stream pun I used on this blog. That it took me till the 4th Notional Pipe stream to see the obvious is a regret I’ll take to my grave.

Anyway, last weeks stream was good, but it got pretty esoteric! Take a look if you want to hear me rant about the evils of auto-rigging and Maya’s lack of a built-in method to mirror transform-space blendshapes.

So for this stream, we’re going to take a break from the pirate and go back to basics. I’ll be rigging a different character from scratch with Contour, and this time I’ll be taking it all the way to being a usable rig instead of diverting to subjects like tweak controls and PSDs, useful though those subjects are. This is basically going to be Contour 101 even more then the pirate is, so if you want a sense of what it’s like to rig a character from stem to stern with Contour without Python or diversions into more complex Maya rigging topics, this is the one to watch.

Come join us at 4PM EST at https://youtu.be/cLTwnZrAIGw

Perchance To Stream

Aye, there’s the rub. For in that sleep of death, what streams may come?

It’s a trick question—the answer is a Notional Pipe stream, and you don’t even have to be dead (though if any of the dearly departed want to haunt our stream, we’d be cool with that too). Come join us at 4pm EST at https://youtu.be/_9wuikc4DDU

We’ve also put up a new Contour demo video:

And a bunch of clips from previous streams:

Runnin Down a Stream

Our stream last Tuesday was a lot of fun! We started rigging a pirate, talked about Contour deformation on thick objects and why stretchy fingers are useful, and did some additive rigging by layering a conventional skin cluster on top of Contour deformation for tweak controls. For anyone who missed it, here it is:

We’re doing it again today! Join us at the Notional Pipe youtube channel for more piratical rigging at 4pm EST.

Lucid Streaming

Just a reminder that we’re doing our first stream over at the Notional Pipe Youtube channel at 4pm EST today, and every Tuesday thereafter. Today I’ll start rigging a character with Contour. In future streams, I’ll be applying an ephemeral control rig and demonstrate animating the character with the latest version of the ephemeral system.

We’ll be posting the stream after the fact for anyone who can’t be there, but if you can make it, you’ll be able to ask questions and guide the discussion. We hope to make this a very interactive process!

You may say I'm a streamer

I’ve been a bit silent these last few months, largely because between doing a new series of Hacked shorts for Hero for Hire and joining The Third Floor at the same time, I’ve barely had time to do basic things like eat or breathe.

Fear not! Content will soon return to Just to do Something Bad. In particular, Tagore Smith of Notional Pipe and I will be starting a rigging and animation stream. We’ll be starting with rigging a character from scratch with Contour Rig Tools and proceeding from there to a live demonstration of animation with an ephemeral rig, and we’re likely to discuss a wide range of rigging and animation subjects.

We’ll be doing our first stream on April 5th at 4pm EST. You can watch it here: https://www.youtube.com/channel/UCoTin4y_JsdGbK2imeiGTQA/live

Here's the Little Bird Presentation

Our presentation at CTN expo 2021 has been posted! Here it is:

The presentation is divided between Chris Perry (Writer/Director/Cinematographer), Jill Daniels (Art Director/Background artist) and I. You won't see the whole film here, but you will get so see glimpses of it, plus a LOT of information on production and our UE tools. A lot of stuff I've been talking about on this blog over the past year leads right up to this production!

Little Bird was rigged an animated using the latest version of the ephemeral system and Contour Rig Tools.

Little Bird Presentation at CTN

Hey, I’ve announced this on Twitter but never actually did a post about it. In a little over 24 hours, at 2:30 PST, Chris Perry, Jill Daniels, and I will be doing a presentation on the making of our short Little Bird at CTN. We’ll be talking about the new multi-pass rendering and compositing tools I’ve been showing you bits a pieces of, and what it was like using them on a real production. This was also the first production to use Mark 3 of the ephemeral system, and all the deformation rigging was done with Contour.

CTN is being held partly in-person and partly remotely this year. I’ll be joining remotely myself. Getting a remote ticket is pretty cheap—it’s $17. No, I didn’t forget any zeroes there! Anyone who has the time should definitely tune in, and if you don’t it’s going to be recorded.

There will be plenty of question and answer after the presentation. If there are further questions, I’m going to be hosting an extended question and answer session on Discord (the link will be posted at the talk).

Be there, or you will surely be defined as a polygon with four edges of equal length and four right angles.

The Return of Anzovin Rig Tools

Long ago, when the world was young (so about 2010 or so), the ancient Rigging Masters of Anzovin Studio received a vision of an extraordinary new character rigging tool, built for the needs of modern character rigs. For years they toiled, until their labor bore fruit as a Maya plug-in. They named their creation Anzovin Rig Tools, and they saw that it was good.

But then came The Day Of Too Many Cash Flow Problems, and Anzovin Studio fell into darkness. In the ruin of that great house, many believed that Anzovin Rig Tools had perished forever. But Anzovin Rig Tools could not be killed so easily! It survived. It changed its name and went into hiding. It learned how to survive in the wastes. It learned kung-fu. It learned the secret names of the immortal space wizards, and bound them it it’s service. It learned how to juggle and make artisanal flower arrangements. And it bided it’s time for the right moment to return.

That time is now! I’m very happy to announce that the tool formerly known as Anzovin Rig Tools, now called Contour Rig Tools, has been acquired by a new company called Notional Pipe, and is finally being released! You can grab the demo and an example rig right now.

For those of you who may not be familiar with it, Contour Rig Tools is a spline-based rigging tool that Tagore Smith, Brian Kendall, and I created at Anzovin Studio (by a strange coincidence, we’re also the three principals of Notional Pipe. Not sure how that happened.) The central concept of Contour is that characters are mostly made out of tubes--arms, torsos, fingers, tails, etc--and that if you had a really great way to deform tube-like shapes, you’d solve a huge amount of the problems riggers face on a daily basis. Contour’s bones, constraints, and Ik handle are all based around a novel spline deformation method that produces near-perfect deformation for almost any curve.

Now, spline deformation has been around basically forever, and isn’t very commonly used--most rigs that use splines at all use them to drive joints rather than to deform a mesh. The reason for this is that, well, most implementations of spline deformation kind of suck for most purposes. Think about rigging with wire deformers--there’s a reason we don’t do that very much.

Contour...is not very much like a wire deformer.

Note that I haven’t painted a single weight here, but the bend and twist deformation is basically perfect. This is about the simplest thing you can do with Contour....and it’s the equivalent of a very advanced and complex conventional rig. Here’s what Contour looks like when used to create an entire character rig:

Because I’m one of the developers, I’ve been able to use Contour in production for years. Just about every single thing you’ve seen from me in the last eight years or so used Contour in some way, and every single Ephemeral rigging example I’ve shown on this blog has used Contour for deformation. I can’t stress enough how much this has changed deformation rigging for me. It’s drastically easier.

As an example, here’s a production I recently worked on for the Boston-based studio Hero4Hire:

I was in charge of all the character rigging, animation, and rendering, assisted by Katie Taccone and Karen Webb of Open Pixel. This production was completed in three weeks, starting from an animatic and completed character model but with no rigging or layout. It definitely has some rough edges due to the compressed schedule, but that it was achievable at all is pretty much down to Contour and the Ephemeral system. Notably, although this character goes through a bunch of cartoony distortions and has a very full-featured rig, rigging him with Contour took about four hours.

Contour Rig Tools is completely free for animation use (you only need a license to create or modify rigs), and the demo offers full rigging functionality for 30 days, so there’s no reason not to check it out! We’re still working on integrating payment and subscription management into the site, but you can absolutely buy Contour--you’ll just need to get in touch with us. The Get Contour page of the site has more details!

Just don’t call it Anzovin Rig Tools. That man is dead. Only Contour remains.

(As a side note, in addition to publishing Contour Rig Tools and eventually the Ephemeral system, Notional Pipe is open for consulting work on animation tools development. If you need experienced Maya developers to implement rigging, animation, or general pipeline tools, please get in touch).

Stylized rendering part the first: shadow extraction

gunslingers.png

In which some hacks are better than others, you can create perfectly flat shading by reversing the polarity of the neutron flow, and there is still life left in the grizzled old gunslinger known only as “shadow mapping.”

As you may recall, last year I showed my first attempt at creating a stylized rendering process in UE. It was mostly successful, but required some ridiculously horrific hacks, for which I may never be forgiven.

The current version still uses a lot of hacks, but they’re much less evil. One of the worst ones I used back then was the method of extracting shadows. It’s essential to this process to be able to treat shadows and lights separately: because the shapes that various elements make on screen is much more important than whether the shadow and light are coming from the same direction.

This is tricky to do in UE. In theory, there’s no reason UE couldn’t just write the results of shadow map calculations to a separate buffer, but that’s not what the renderer is designed to do. Fixing that directly would require forking the engine and creating a custom shading model, and while that may well be the right solution in the long run, it’s not something I want to do right now.

The solution I used last year was to set up two identical lights. One casts shadows, and one does not. Because a shadowed light would be created by multiplying the results of the light by the results of the shadow map, you can get just the shadow back out again by dividing the final result by the result of the light (luckily, UEs response to a divide by zero is to leave the pixel black, rather then error, or this wouldn’t work).

badShadow.PNG

Not only is this solution an offense against the laws of god and man, it also sucks. Since there is no shadow data past the light’s terminator, the shadows are incompletely extracted, and you have to be very careful with the shadow direction to use them at all. I’m sure that Dante failed to include a circle of hell for this exact situation only because he could not conceive of an act so utterly depraved.

Luckily, I’ve since come up with a much better solution, one so simple that I smacked myself on the forehead for not thinking of it sooner. If the shadow is being combined with the light, and we want just the shadow, the best thing we can possibly do is make the value of the lit surface 1 for every pixel. That will give us a pure shadow pass, as multiplying anything by 1 is, well, that thing. We can do that very easily by simply pointing every normal along the surface directly at the light!

For point lights, that’s just the inverse of the method I showed last time for generating spherical normals: instead of having a normal that points away from a point, we make one that points towards it. That’s just a matter of reversing the polarity of the neu I mean order of the vector subtraction used to generate the new normal.

pointLight.png

For directionals, it’s even easier--the forward vector of the light is just the reverse of the normal we want, so all we have to do is multiply it by -1 to get the correct normal:

distLight.png

I’m publishing the point or direction vector using the same method I used to publish the location of Jinx’s head. In this case, though, I don’t have to create an event track in Sequencer to publish the light’s location each frame. I can simply have the shadow-pass render element find any Little Bird lights that belong to it and publish their values. This function is called right before the render element renders the shadow pass:

publish.PNG

Once again, we discover that the grizzled veteran known as the shadow map still has enough life in those old bones to shoot all the bad guys. (I’m imagining here that the shadow map is played by either Clint Eastwood or Sam Elliot.)

goodShadow.PNG

Shadow bias values are extremely effective here at making this shadow map usable, since they let us push the shadow away from the surface so that it doesn’t happen right at the terminator. Normally it’s not a problem for the surface to be fully shadowed at the terminator, because if you’re projecting the shadow from the same direction as the light both terminators will be in the same place, so the light won’t get suddenly cut off at the shadow projection’s terminator. But here we’re projecting shadows from a different direction, so pushing the shadow away from the terminator is important.

Approximate terminator of the shadow-casting light. Because this is a pure shadow pass and shadow map bias is being used heavily, shadow information continues past the terminator.

Approximate terminator of the shadow-casting light. Because this is a pure shadow pass and shadow map bias is being used heavily, shadow information continues past the terminator.

By contrast, a ray traced shadow is always perfectly accurate, and therefore would allow us no wiggle room at the terminator (The terminator is played by Arnold Schwartzenegger, obviously).

This also has the effect of simplifying the shadow shapes. Ray tracing is great for photorealistic uses but ironically all the old cheats I thought were dying out turn out to have a second career in nonphotorealistic rendering.

Next time we’ll take a look at the Little Bird background projection system.

Stylized rendering part the first: smoothed shading

In which Material Parameter Collections can be awkward, a box blur displays surprising capabilities, and a cartoon should probably be here, but isn’t.

Last time, I showed a NPR rendering test, and briefly mentioned the various systems that go into making it work. Now I’m examining the first of those systems, the screen-space shading smoothing that makes the shading look graphical.

There are two techniques being used here. The first involves generating normals at render time for some spherical shapes. This is particularly useful on heads, where I really want to remove as much detail as possible. That doesn’t just go for facial features that are internal to the head shape--I also want her ears and hair tufts to change her silhouette but not add any internal detail to the shading. That’s an important part of making the head feel graphic.

This is very easy to do for any kind of spherical-ish shape. Basically, you just need to know what the center point of the sphere is. Knowing that is easy--I’ve constrained a null to her head in Maya and exported it to UE as an FBX.

Unfortunately, making that information available in a shader can be kind of awkward in UE. One way to do it would be to make the material a Dynamic Material Instance, so that a blueprint can set its parameter values at runtime. This works fine but requires some additional machinery to generate and keep track of the Dynamic Material Instance when needed, as you’d have a different one for each shot. Another is to use a Material Parameter Collection, which lets you set global values that any material can use. This makes it very easy to publish data--you just set a scalar or vector value, and any material can see it!--but since you’re limited to two Material Parameter Collections in any given shader, you basically have a limited number of namespaces which pretty quickly get cluttered with lots of different kinds of data you might want to publish. And either way, you have to actually make that data get published when needed.

In this case, I’ve chosen to use a value in a Material Parameter Collection, though I think a Dynamic Material Instance might actually be the right answer in the future, as I don’t care for how cluttered my Material Parameter Collections get. To publish that value, I made a simple Actor that gets it’s own location and sets the value in the Collection:

setHeadCenter.png

I’m calling the actor’s “Drive Head Point” blueprint from an event track in sequencer that triggers it every frame:

eventBar.png

It’s kind of ugly but it’s easy to set up and it works. There are better solutions, but it looks like they’d require digging into the C++ side of UE more than I want to do right now.

Then, to create the normals, all the shader has to do is to create a vector using the position of the pixel currently being rendered and the spherical center point. And that’s all you need to do to make spherical normals! I’ve also added a texture map that lets me blend from the spherical normals to the vertex normals, so that I can tell some areas of the mesh, like the inside of the ears, not to use them.

sphericalnormals.PNG

So that simplifies the head considerably, making the ears and hair tufts feel a lot more graphical. But it’s not sufficient, because the way the light reacts to the normals still feels like a 3D object--just a simpler object.

I don’t want the way light falls off to feel 3D. And of course, the rest of her body won’t be amenable to this technique; there’s no useful spherical center point for a hand or arm. You could do something more complex, like publish the control points of a spline that runs through the arm instead, and then find the closest point on the spline in the shader to give you a point to generate a normal from, but this presents both a bunch of additional problems (like, what if you have a mesh like the pants that would require multiple curves? Do you need weight values too?), is a lot more difficult to implement, and wouldn’t really solve the larger problem of “this shouldn’t even look like 3D falloff to begin with.”

What I need is a general-purpose way of smoothing out shading. After years of trying out different techniques on different projects, I came to the conclusion that this really needed to happen in screen space. The problem with anything you do with 3D surfaces is that they look 3D. To make something graphical, you need to consider its shape on screen instead.

The solution I came up with is actually just a plain old box blur....but with some special additions. Just blurring the whole image would obviously be wrong. There are smart blur algorithms that try to smooth things in the image without removing visible details, but I specifically want to remove visible details! So doing a smart blur based on depth (for instance) wouldn’t work. Instead, I ended up solving the issue by specifically defining “blur regions.” I worked with Morgan Robinson to test this idea with a simple Python script, treating test images as Numpy arrays. Once the concept had been proven to work, I worked with Zurab Abelashvili to write an HLSL version that could be inserted into a UE post-process shader.

The way any blur works is that it looks at pixel values within a given window and averages them. You can cause the blur to happen within a specific region by simply ignoring pixels outside the region, and not including them in the average. For instance, if you blur the lighting pass and include only pixels inside the character’s shape, you get this:

allBlurred.png

The next step is to limit the blur to multiple specific regions. If the lower arm is in a different region from the upper arm, they won’t be able to blur together like this, even when the arm is bent. Implementing this with multiple masks and blur passes would be too slow, so I made a pass with color IDs instead:

PrimaryRegions.png

While calculating the blur, you check each pixel that might contribute to the average, and ask whether it has the same ID as the pixel currently being rendered. If the answer is no, you ignore it. That gets you this:

withSeams.png

Closer, but all the seams are a problem, and you can’t get around the need to have so many regions--if the upper and lower arms aren’t separate you'd get them blending into each other when the arm bends.

This can be solved by using secondary regions. So anything right at the elbow can blend with both the upper arm and lower arm, but the upper and lower arms can’t blend with each other. Put in a more strictly logical (and code friendly!) way, that means a pixel must be in both the same primary region and the same secondary region as the pixel currently being rendered to contribute to the blur.

Here’s our secondary regions:

SecondaryRegions.png

You don’t need to have secondary regions everywhere—pixels that are black effectively mean that the pixel is part of the default secondary region, which means that only the primary regions will effect what pixels are considered, just as if there were no secondary regions. You only need to introduce them at the border between two primary regions to make it possible to blend over the border.

Here’s the result:

fingerBanding.png

Mostly this has solved the issue, but smaller regions like the fingers are still showing banding. That’s because the radius of the blur is the same everywhere, which means it’s huge compared to the fingers. In order to avoid banding, the radius can’t be much larger than the size of the secondary regions in screen space.

Fixing that is just a matter of having a pass where each pixel is a multiplier for the radius value:

In this case the values happen to be flat across major sections of the character, because that’s all that was necessary here, but you could paint gradients that gradually shift the radius too.

To avoid rendering an additional three whole passes per frame, I combine the ID passes into a single render pass by sticking the primary IDs into R, the secondary into G, and the radius multiplier into B. This pass includes all the data needed to calculate the blur.

combinedRegions.png

And the result of the blur using the data from this image looks like this:

finalBlurred.png

That’s the result I’m using in the final render. There’s still a little bit of banding on the fingers. This could be removed by painting a map that lowered the radius for the fingers a bit more while keeping it what it is on the palm. However, this was never actually that noticeable once the blurred lighting pass was combined with color and rim passes, so I just left it in.

The post-process shader that performs the blur looks like this:

shader.png

The blur is all happening in the custom node, with HLSL code displayed on the left. There are a few things going on here that I haven’t mentioned and aren’t specifically part of the blur process itself. The radius value is being made relative to the view size, so that I can change the resolution of the render and still get the same result. The radius is also being adjusted based on depth, so that the radius shrinks as the character gets farther from camera.

You may also note variables in the HLSL that refer to “OriginalNormal”—that’s left over from an earlier concept where I was planning to use this method to blur normal values rather then directly blur a lighting pass. In the future, we might get even better results using a Gaussian blur rather then a box blur, at the cost of increased complexity and decreased performance—since the radius is variable, we couldn’t just create a Gaussian matrix and reuse it for every pixel, we’d have to calculate the Gaussian weight values for each pixel independently, which isn’t generally something you want to do in real time with a large radius. There are probably ways to approximate a Gaussian blur that would be performant enough but I haven’t really looked into them. For the moment, the box blur seems to be working great.

Next time we’ll take a look at a good shadow extraction method for UE!

A fully-operational real-time stylized animation and rendering pipeline!

emperor.png

Here’s a test using a bunch of the tools and techniques I’ve been working on in Unreal lately! It’s probably pretty close to what the final short will look like:

This is all being rendered and composited completely in real time in UE, and what you’re seeing here is the direct output from UE with no modification. It actually reaches 35 fps when not in playback (when it’s capped to 24, of course)! Background art by Chris Barret.

As you may recall, the point of all this--ephemeral rigging, interpolationless animation, real-time NPR rendering--is to do animation productions that can have high-production values and full character animation, but also be relatively fast and cheap to produce. A big part of that is being able to use illustrated backgrounds, which (depending on style) can be much cheaper to produce than building a lot of CG assets, and allow a much more direct way to produce the final image.

But to make this work, you really can’t render something in a conventional, physically-based, photorealistic CG style. There are really two reasons for that: one, conventional CG against painterly or graphic backdrops would stick out like a sore thumb, and feel completely wrong stylistically. And painting backdrops in a photorealistic style would wipe out the speed advantage (and, in fact, reverse it!). Two, the very perfection of photorealistic CG demands a higher level of animation polish. Most drawn animation, even highly polished drawn animation of the classic Disney variety, includes lots of wiggles, “wall hits,” “dead” frames, and other things we CG animators struggle mightily to force out of our animation with endless rounds of polish. It’s just not as much of an issue in drawn animation, because the visually graphic style is much more forgiving. A sufficiently stylized rendering approach gives you similar advantages.

I think that this is because the graphical look of drawn artwork contains less information. The beauty of drawing and painting is that the artist is presenting only necessary information, and the viewer's own mind fills in the rest. This gives the viewer’s eye permission to elide any imperfections. It’s the same way with variable pose rate vs full frame rate animation: if you’re using a mix of 1s and 2s and flow your poses together well, the lower information density lets you get away with murder in terms of polish However, while lots of research has gone into NPR rendering over the years, very few of the NPR techniques I’m familiar with actually simplify an image very much.

Consider the classic two-tone, created by rendering a conventional lighting pass and reducing it to two colors with a threshold:

JinxShading_badTwoTone.png

The line of the terminator is picking up all kinds of detail from the mesh’s actual curvature and it’s ugly as sin. Sure, this image has lower information density then a full render, but it’s still got way too much, and in the worst possible places.

A number of projects have successfully overcome this issue, but most of their methods aren’t useful to me. ARC System Works used an interesting approach for their Guilty Gear games, where they directly manipulated vertex normals to simplify the shading. This works well for their anime-inspired style, where large shapes are usually broken up with details like belts, collars, and exposed pectorals, but when I tried it out I found it very difficult to produce shading that was simple enough with larger shapes and a subdivided mesh. Another approach is that taken by the short One Small Step. Their approach looks amazing, but apparently required a lot of shot-by-shot tweaking of the mesh, which is something I specifically want to avoid. Then there’s productions like Spider-verse or this League of Legends short, which have great stylized looks but don’t really aim to simplify the shading. Miles Morale’s face may have drawn lines defining his forehead wrinkles, and a dot pattern that evokes silver-age comics printing techniques, but you can still see most of the usual shading detail of a conventional render underneath it.

For The New Pioneers and the Monkey test, we used a method that smoothed the normals on the surface by averaging them with their neighbors, essentially blurring them. This worked some of the time, but a lot of the time it didn’t really produce the simple two-tone we were looking for, and we had to do a bunch of per-shot compositing trickery with animated masks to fix issues with various shots. While there will probably always be a few shots that need individual tweaks, I don’t want that to be the norm. The idea here is rapid production.

The primary method I’m using for this test is, as far as I know, novel. I worked with Morgan Robinson and Zurab Abelashvili to develop a post-process shader that blurs lighting in screen space to remove small scale details. Combined with some tricks that generate normals for spherical-ish shapes like the head, this gives a much more satisfactory simplification to my eye than blurring the vertex normals did. Here’s a comparison between a conventional two-tone and a two-tone created with this light-blurring system:

Two-tones using this system work a lot better, but I’ve actually come to think that the best use of it is for simplified continuous shading:

When combined with “fake” rim lights and the right textures, this provides just the kind of graphic look I’m going for. For those “fake” rims, I’m using a system Chris Perry and I developed for our Epic Megagrant-funded short Little Bird (more on that soon!) that uses a combination of edge detection and lighting to produce very even, graphic rim lights. I’m also using the camera projection system we developed for Little Bird for the background. Each of these systems really deserves it’s own post, and I’m going to be going through them one by one in future posts.

This is the first time I’ve felt like I had all the tools I needed to make this kind of production work. There’s still important tooling and automation missing from the pipeline that you’d really need to make it scalable for a large project, but the real unknowns have been tackled. Everything is proceeding as I have foreseen.

Live on Thursday at the Animation Exchange

Our panel We Don’t Need No Interpolation: Character Animation with Dense Animation Data will be live streaming Thursday at 1:00 pm Pacific Time at the AnimState Twitch Channel. You guys will be able to ask me, Richard Lico, and Brad Clark questions on the stream and we’ll discuss them!

The Animation Exchange is free, and there will be a lot of other cool talks (I’m particularly looking forward to The Animation of Miles Morales, since I regard Spider Man: Miles Morales as the all-time high-water mark on in-game animation).

Hey, Keyframes, Leave Them Animators Alone!

I’m happy to announce that I’ll be joining a panel at the free virtual conference The Animation Exchange, along with Richard Lico and Brad Clark. It’s called We Don’t Need No Interpolation: Character Animation With Dense Animation Data.

Richard takes an approach that’s sort of the inverse of ephemeral rigging—he uses a conventional rig that can be manipulated with the graph editor and animation layers, but periodically bakes the results down to an underlying deformation rig so that he can swap out different control rigs. I’ve started thinking of this as a “temporal” approach to interpolationless animation, whereas ephemeral rigging is a “spatial” approach: that is, I’m focused on making it very easy to pose a character, and he’s focused on making it very easy to make time-based edits. In the long run, these two approaches shouldn’t have to be separate: that’s just an artifact of trying to hack an interpolationless approach into Maya’s keyframe-based system.

Brad has been a proponent of interpolationless and interpolationless-adjacent animation for a very long time—I remember him suggesting to me way back in the mid-aughts that using the same rig for manipulation and for interpolation was possibly not the best idea, even though I didn’t really get it till years later. He’s got an interesting perspective on the history of animation tools development, and can point to much earlier examples of an interpolationless approach then I’d ever expected. Animating with dense data isn’t new: it was just murdered by it’s sibling, keyframe animation. Now it’s going to return from death and plot a complex revenge.

Ephemeral Rig System Mark 3 First Look

brothers2.png

It’s now been more than a year since I presented Mark 2 of the ephemeral rigging system at SIGGRAPH. Before that point, this blog had regular updates. After that, I kind of went dark for a while, and it might have appeared as if development of the ephemeral system stalled out.

A lot of that time went into working on other stuff, mostly stuff that pays bills, some of which might eventually make its way onto this blog but most of which was just standard rigging work that gets me by day to day (among other things, I’m responsible for the facial rigging on Crucible and most of the hand-animated portions of this otter-focused museum attraction). But in secret, I was also collaborating with Tagore Smith on ephemeral system Mark 3. Now, for the first time, the terrible fruits of our labors will be revealed. Take a look at the very first shots animated with Mark 3, drawn from the Epic Megagrant project Chris Perry and I are working on:

“Aliyah” character design by Jill Daniels, sculpt by Carol Cornils.

Mark 2 was a prototype. When I started trying to write it I didn’t really understand what it was or how it should work yet, and I was limited by my programming experience, which had primarily been the kind of script bashing that doesn’t really teach you how to actually engineer a piece of software (all Anzovin Studio’s tools, while often designed by me, were programmed by actual programmers like Tagore, Brian Kendall, and Connie Hildreth). The resulting system was basically held together with duct tape and spit. It was usable--I was able to animate with it, and even use it on a few productions--but it was clunky and limited. Expanding it and adding more features was going to become exponentially more difficult as the system grew. It was never going to become a polished production tool.

With Tagore ensuring that the new system was engineered soundly, we’ve rewritten Mark 3 from the ground up to be much more robust then Mark 2 ever could have been. For instance, the way Mark 2 puppets the Maya DG only allowed for one-way behavior: the ephemeral system could control a node, or it could be controlled by a node, but never both. This meant that it could never support multiple selection for interaction. It also meant that interaction, breakdown, and zero all ended up requiring different graph types with inconsistent rules, which is why (for instance) you could use a plethora of modes for interaction but were limited to just Default and Forward for breakdown and zero operations.

Mark 3 has one unified graph that can accept updated matrices for any set of ephemeral transforms and order and evaluate them correctly, then drive transforms in the Maya graph whether or not they are also inputs (i.e. where those new matrices came from!).

Note that the tail interaction is a bit slow since the system hasn’t been optimized for a whole bunch of nodes selected at the same time yet, but that’s very optimizable and shouldn’t be an issue in future versions.

This much more robust graph also allows for all kinds of nice behavior that the Mark 2 ephemeral graph couldn’t manage. Take a look at these backward interactions, for instance:

Yes, you can now swing the hips (or the entire body) backwards from the knee, or swing the body backwards from the neck, with exactly the behavior you’d expect. This has been incredibly helpful when animating a character in zero G!

This also allows the graph to evaluate breakdowns, zeroes, and other slider interactions in precisely the same way it does manipulator interactions, since the new graph accepts any set of new matrices as an input. What this means in practice is that the ephemeral graph can receive a pose (which is just a collection of matrices, after all) and blend some or all of the ephemeral controls in the character towards that pose. A breakdown is just blending the character towards a pose from a different frame. A zero is blending the character towards the default pose. And because the pose blend in question is being evaluated through the same ephemeral graph as any interaction, you can use the full spread of possible ephemeral behavior available when making breakdowns or other pose blends.

It also means that zero no longer has to behave in an FK-like way as with Mark 2. Instead, you can zero anything relative to anything else through any set of relationships the ephemeral system allows. Here, the elbow is being zeroed in Forward mode (relative to the shoulder, with the hand following it), Backward (relative to the hand, with the shoulder following it—note that it stays bent in that case because the shoulder is already at right handles to the elbow and will maintain that relationship unless it’s also included in the zero operation), and Default (relative to the hand and shoulder, which has the effect of placing it directly between them):

You can also exclude translate, rotate, or scale from a pose blend. This is particularly helpful when using the zero slider, as zeroing translation alone effectively allows you to reset the length of a particular bone to it’s default--quite useful when making sure a pose is on-model, since the ephemeral system currently makes no attempt to enforce character proportions on you (though enforcing proportions would be theoretically possible using an ephemeral rig and will probably be a feature of this system eventually).

Since all pose blends are unified, it’s quite easy to blend towards completely arbitrary poses too. For now we just have the ability to store (ie copy) a particular pose and blend towards that, but eventually I’d like to build in an ephemeral pose library.

Note that, again, how the pose is applied respects ephemeral modes: applying in Forward or in Default mode gets you different results.

Depending on how you calculate the blend matrices, you can do cool things like overshoots (which extrapolate a new pose from previous animation) or smooths (which averages a transform with both it’s past and future states to smooth out discontinuities in motion:

There’s a lot more to go into in future posts, but for now I’d like to close by announcing that, while it will be some time till Mark 3 is ready for a wide release and I can’t put a specific date on it, it will become a commercial product. We’ll be releasing the ephemeral system through Notional Pipe, the company Tagore, Brian, and I have formed to release Contour Rig Tools (formerly known as Anzovin Rig Tools). The internals of the new system no longer rely on Maya at all, so there are a variety of directions we could take it in the future!

Making a Level Sequence act like a shot

unholy_union.png

Last time I discussed our under-construction unreal pipeline, I talked about how to make Unreal behave like a renderer plus an offline compositor. Our tests were very successful, but left a significant issue unaddressed--how do you do you set up compositions separately for different shots in a sequence?

Since then, I’ve come to think that this is a more general purpose question that isn’t specifically tied to compositing alone. The question is, how do you make a level sequence behave like a shot?

Shots in a conventional, DCC-centric pipeline correspond to scenes. A Maya scene contains all the animation data for a shot, and also either references or contains all the other data the shot requires ie. meshes, rigs, etc. Tools like USD exist to compose shot data in more sophisticated ways, but usually are also set up to include whatever data is necessary to represent a given shot. Regardless or what other data files they may reference, looking at a Maya scene or a USD stage for a given shot shows you whatever that shot is supposed to be (or at least a representation of it that corresponds to a particular stage of the pipeline).

This isn’t the way Unreal works--level sequences don’t include all the data necessary to display a shot, just the animation data. You can make an actor “spawnable,” tying it to the level sequence, but this isn’t a satisfactory replacement for a “shot,” because spawnable actors don’t maintain relationships to each other: they don’t maintain “attachment” (Unreal’s version of parenting), for instance, or maintain the relationships between Composure elements.

In a lot of ways, this isn’t surprising--Unreal, after all, is a game engine, and the scenario Sequencer (and it’s progenitor, Matinee) was originally designed for is pretty different to the one we’re putting it to now. Looking at Level Sequences as a tool for in-game cinematics, for instance, their design makes perfect sense: You have a level. The level has actors in it. You need to be able to control those actors in a time-based way, and maybe add a few things on a per-shot basis like cameras or effects. You wouldn’t expect the scene and the relationship between actors in it to change completely from shot to shot. That’s certainly the impression one would get from Epic’s Sequencer demos and training materials--they tend to focus on designing camera cuts around existing animated material, all in the same level.

There are several reasons why this doesn’t work for us. We’re relying on complex Composure composites with attached lighting, and those composites and lighting may need to be entirely different from shot to shot. We need to be able to animate elements of the shot (like cameras) in ad-hoc hierarchies. Because we are relying on a combination of traditional assets and illustrations projected on shot-specific projection geometry, environmental elements themselves may differ significantly from shot to shot (not to mention the bit where you sometimes cut to a completely different location, which of course, in narrative film, is something you do all the time). And finally, it’s not the way I want to think about shots in the context of animated filmmaking. Shooting a “set” and “actors” like a live action film is certainly one way to approach CG animation, but animation is not live action, and I don’t want to be forced to work in that way. The bespoke creation of content that is catered specifically to a specific shot is one of animation’s greatest artistic advantages.

In other words, what we need is not the ability to spawn an actor in a given sequence--we need to “spawn” an entire level. Thankfully, Unreal lets us do this!

Note that the contents of the outliner here are changing completely from shot to shot. The key here is the “level visibility track.” This allows us to have per-shot sublevels that just turn themselves on and off as needed--the level will default to off, but be turned on when the sequence that includes it’s Level Visibility Track is playing. Notably, when a sublevel is turned off it isn’t just not being drawn--it’s actually been “streamed out” and is not evaluating at all, which is very important for performance (otherwise, you might have every shot’s Composure elements trying to render at once!)

What this means is that we can essentially divide the contents of a shot into two categories--the shots Level (what is in the shot) and the shot’s Level Sequence (how the entities in the shot move). A Maya scene happens to store both of these elements together, but you could similarly conceive of them as being something separate, and indeed we kind of need to think of them as being separate in order to move animation data back and forth.

Now, just like my hacky solution to Unreal shadow passes, joining the sublevel and Level Sequence conceptually without actually joining them together in the UI is clearly a crime against the laws of god and man. Keeping the Level Sequence and its corresponding sublevel together ends up being the responsibility of the artist working on the edit in Unreal--if you open up the Level Sequence and the shot’s level is not a sublevel of whatever level you happen to be looking at, all your shots actual data will be missing and all your tracks will turn error-message red as your sequence stares at you, it’s cruel creator, in wordless horror. But when you’re taking a game engine and turning it to an entirely different purpose then the one it was designed for you’re going to have to necessarily accept the occasional breach of medical ethics.

One open question about this approach is performance--I’m not sure if hiding and unhiding sublevels has a significant performance cost or not, because the tests I’ve done so far have been done using relatively simple scenes. As work on our short progresses we’ll find out if streaming in a more complex set will cause a hitch on the camera cut. One thing that works in our favor here is that our needs for per-shot data aren’t that large--we’re not going to be doing very geometry-heavy sets for this project in any case, and a lot of the projects I’d like to use this approach for will rely heavily on projected illustrations on simple geometry.

The Problem With Key Poses

library.png

As I’ve previously mentioned, it appears to be very difficult for me to prevent whole and entire books from coming out of my mouth when I try to answer people’s questions. And if you’re going to write a book, you might as well publish it!

Last week I received an email from Iris Chase. With their permission, I’m reproducing the email (lightly edited for brevity) and answering it here, because I’m lazy and only want to write things once.

Hello Raf!

Sorry if this is a bit rambling, your blog just got me really excited!

Seeing your siggraph presentation practically brought tears to my eyes. You're exploring a lot of stuff I've been dreaming of doing for the past couple of years. I want to thank you for all the work you've done and the thoughts you've put out on your blog, which I read in lieu of eating a few days ago (resulting in a splitting headache, haha, worth it).

I understand that you are more interested in mixing 1s and 2s (maybe even 3s?? Blasphemy!) at 24fps but my interest lies in doing things at 60+ (Ideally 120 but I didn't wanna make a "TWOS SPARKLE" type's head explode so we'll just say 60 for now). I'm also interested in the more realistic/subtle (but not quite photoreal, more like a painting).

Obviously I want to avoid linear interpolation, but tuning each frame is impractical at best given those framerates.

You say that maybe ephemeral rigging could be useful for subtly given further development of the tools, have you put much thought into this?

Sticking with the zBrush analogy, where polygonal modelling is still really good for hardsurface modelling, I can't help but feel that splines are better suited for subtle, moving holds. How on earth else do you intend to say "Tilt head .5mm over the course of 5 seconds, no wait not quite that far" to a computer?

You talked about maybe baking everything into a traditional FK rig to fine-tune, but that seems kind of depressing and causes you to lose so many of the advantages of ephemeral rigging, where the graphs don't intuitively map to what you're seeing. As far as I know one of the worst parts about traditional rigs in the first place is how difficult fine-tuning actually is.

I was thinking about it last night and had the thought of interpolating the ephemeral rigs between key poses. Where the interpolation exists only between two poses, and the spline controls just the attenuation of that particular rig, against those particular joints. Then further refinement could be built up on top of the new motionpaths, but only worrying about how the controls of the ephemeral rig attenuates the result of the previous attenuation, potentially resulting in much more intuitive looking/controllable splines (which would just be a factor to drive the rig over time, no coordinates). I'm thinking out loud a little bit here so please stop me if it's ridiculous, and sorry if it's not totally clear, I intend to spend the rest of the day thinking about it, haha.

Thank you for your time,

~Iris.

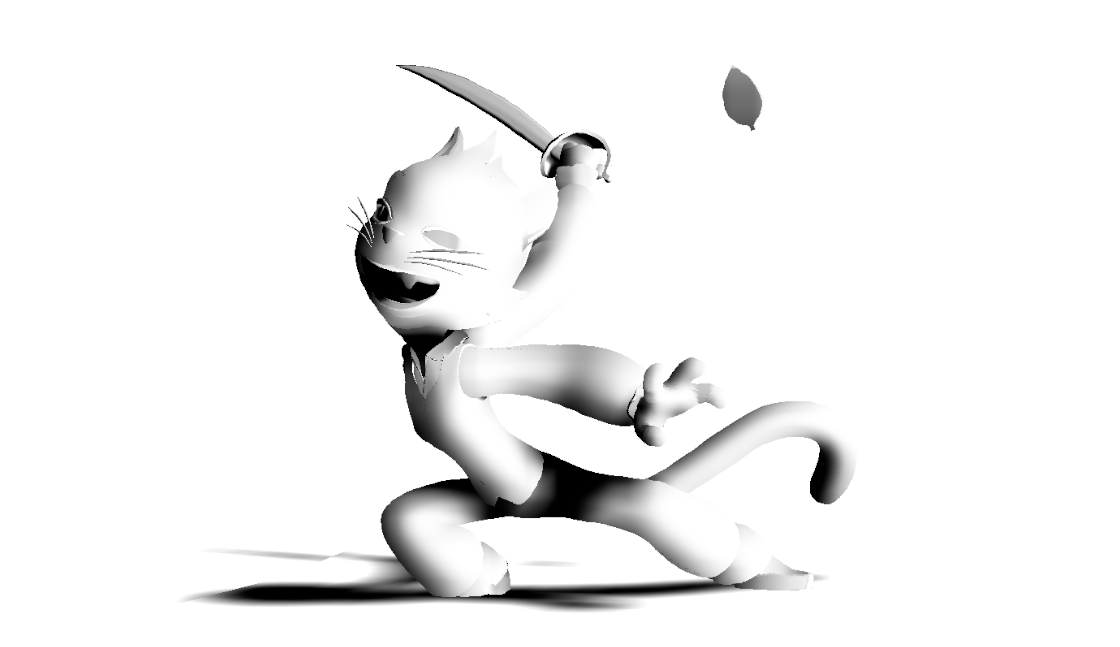
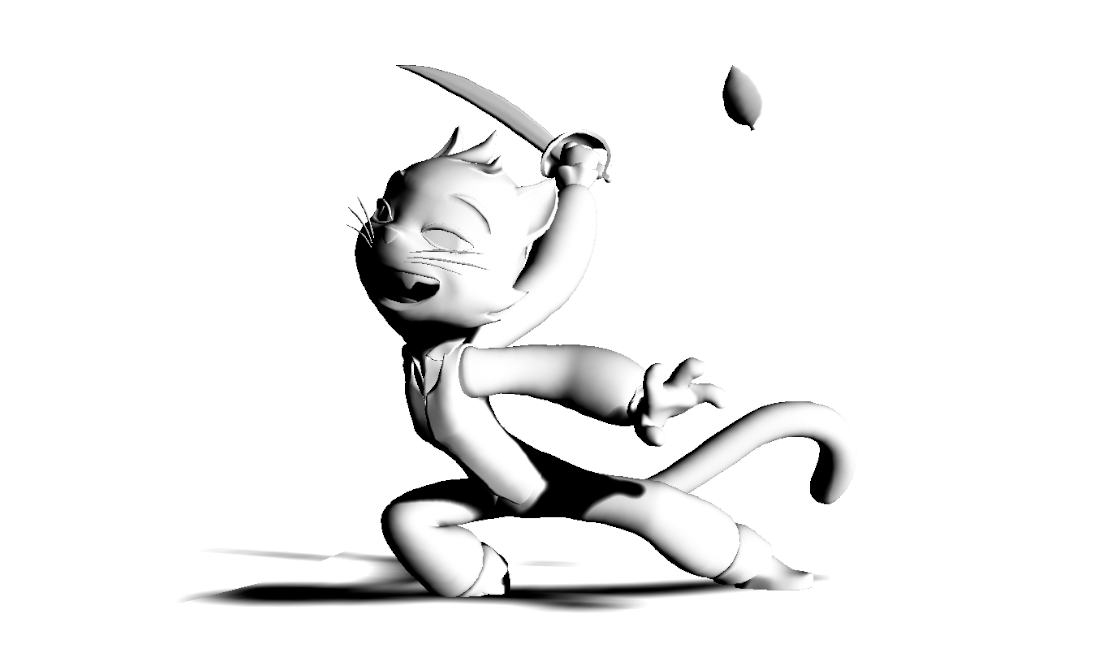
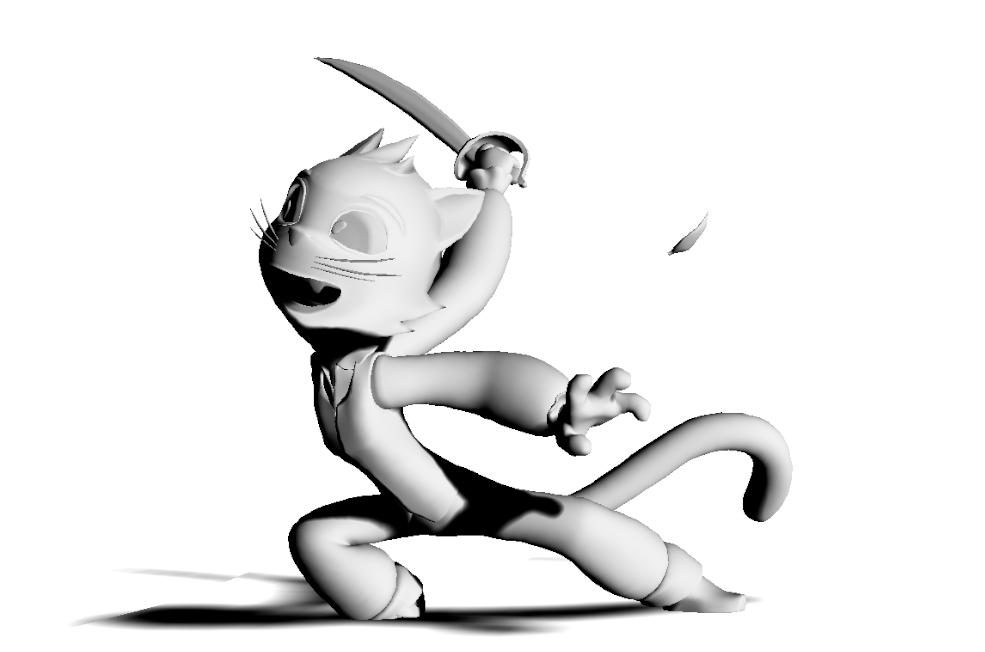
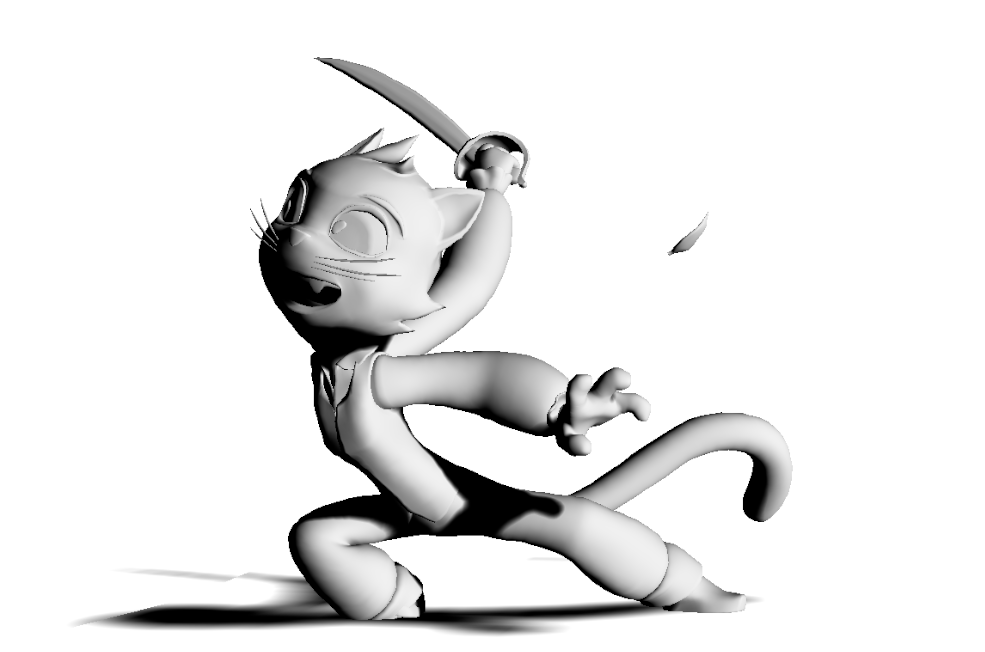
P.S. Your cat is adorable!

First of all, thanks for your email, and I’m glad my thoughts have been helpful to you! This is actually something I’ve been thinking about a lot since SIGGRAPH, where I had a chance to talk to a lot of other people working on animation tools. I was initially looking at this purely from the standpoint of cartoony character animation, but I’ve come to believe that interpolationless animation has, if anything, even greater potential value to people editing very dense animation data. That would include things like mocap data and procedurally generated motion, but it would also include any kind of per-frame animation data at a high frame rate. Yes, I do actually think that 120fps animation would actually be better done interpolationlessly if we had the right tools! Those tools would necessarily have to mean that you wouldn’t have to edit every pose like I do with my variable pose rate cartoony animation.

The idea of interpolating the pose rather than individual controls might indeed be better then what we have in some ways, but I don’t think it address some of the basic issues inherent to key poses. The assumption behind persistent key frames/poses/whatever is that there are specific frames/poses that are useful for defining motion and also for adjusting it. No matter what, if you have key poses that you’re interpolating between and that defines your motion, you’ll have to modify it by adjusting those poses. They’ve essentially been baked into the shot.

I think this assumption ultimately descends from traditional drawn animation, where the concept of key drawings/poses originated. In that case, you’d be drawing your key poses and then making little graphs telling your in-betweening crew how they were supposed to “interpolate.” The key drawings would be pretty much set in stone at that point. But, while I do have something of a reputation for pencil envy and will generally stan traditional animation techniques, it’s worth remembering that drawn animation was invented under production pressure, just like CG, and had its own compromises to make.

This “waterfall pipeline” between key animators and inbetweeners has not by any means always been something animators have liked (Bill Tytla apparently greeted a young Milt Kahl, an inbetweener at the time, with “What scenes have you screwed up lately?”) Some drawn animators prefer to do their own inbetweens when they can, or prefer animating straight ahead, without defining key drawings at all (e.g. Shamus Culhane). And that’s with human inbetweeners who are capable of making intelligent decisions about arcs and character silhouettes in a way even very sophisticated algorithms cannot yet do (though maybe machine learning will change that).

The animation we see on screen is a continuous stream of poses. Key poses are how we rough out the motion and begin to visualize it, but they are not inherent to that motion--what they are is cognitive tools, allowing us to conceptualize motion in mentally digestible slices and make judgements about it’s aesthetic qualities and emotional impact while it is still under construction. When I animate, I try not to become too locked into them. As I begin filling out the character’s movement with breakdowns, I will inevitably begin to see how the key poses should be adjusted to flow better with the movement I’m shaping. By the time I’m finished with the shot, there are no longer any discernible, specific key poses. If I want to rework the motion and decide to return it to a set of key poses, I may well choose a completely different set that most effectively describes the extremes of motion that exist now, as opposed to the ones I was imagining when I began laying down key poses.

To return to the zBrush analogy, the advent of tools like Dynamesh and the ascendency of retopology-based workflows seems to me to essentially be an admission that there aren’t any appropriate set of starting edge loops for a complex organic shape in the general case. You literally can’t make one that won’t be pretty likely to paint you into a corner at some point. Sure, conventional polygonal modeling and subdivs/NURBs are still effective modeling tools for a lot of mechanical shapes, but that’s because those shapes are very “parameterizable”--they have clearly defined topological features like “corners,” but the spaces between those features are simple and can be generated procedurally. Characters generally aren’t like that, either in modeling or in animation, and that’s as true for high frame rates as it is for low ones. They have “specific complexity.”

This view is born out by some of the discussions I had at SIGGRAPH. One of the topics of discussion among animation tools developers is how to take high-frequency data and turn it into something animators can edit without the issues inherent to animation layers. However, research into turning that data into usable keyframes at places like Pixar seems to have foundered on a fundamental issue—no two animators can agree on where those keyframes should be placed! This is one of the primary reasons why I’m beginning to see interpolationless animation as a general solution to the problem of editing motion, not limited to a low/variable pose rate. While I generally haven’t been that interested in procedural animation (wanting as much artistic control as possible), it’s possible that there actually are ways that machine learning could assist animators significantly that just haven’t been explored because they do not fit into a keyframe-based workflow. If all motion is ultimately just per-frame data, and you have the right tools to manipulate that data, then different forms of motion creation can be utilized together much more freely.

So what would tools for editing dense animation data actually look like? This is all pretty speculative, and the real answer is “I don’t entirely know yet.” We won’t be able to see what techniques are most effective till we have a chance to try them out, just as the details of ephemeral rig manipulation came out of developing and testing different versions of the system, and wasn’t conceived of a priori.

However, I do think we can make some educated guesses about what techniques would work well. You can look at the problem, for instance, as one of “control pose placement.” You might start with some poses that you then inbetween (using spline or linear methods). What you’d end up with at that point wouldn’t be keyframes with interpolation—you’d just have a pose on every frame. There would no longer be “key poses.” When you wanted to edit that motion, you’d then choose “edit poses” that would effect the animation as if they were key poses, but they would be chosen on a manipulation-by-manipulation basis, not baked into the scene. You can also think of this as a motion edit with a falloff (like Source Filmmaker) or temporary animation layers (which is kind of like the workflow Richard Lico has developed using standard animation layers and just baking them all the time). If a system like this was integrated with an ephemeral rigging system, you’d have a lot of freedom to manipulate arbitrarily-dense animation data in whatever way you need to.

We’re pretty far away from having such a system now (though I have some hopes that Mark3 of the ephemeral system could eventually grow into one), but I do really believe that it would be the right approach for essentially any form of character or creature animation if the tools were developed far enough.

Regardless, good luck with your own approach! I’m happy to see more people thinking about how to improve animation tools, regardless of whether they end up going down the same roads I am.

As an aside, since you have expressed interest in felines and the adorableness thereof, I present to you these rare images of felis preatorium, the elusive Hallway Panther, photographed in her natural habitat. Travelers in hallways are advised to guard their heels and pants legs carefully against attack by this fierce ambush predator.

jinx.png